

Wie Lange Bekommt Man Bei Qnap Updates
This guide provides detailed step-by-step instructions on how to update the BIOS on a QNAP NAS.
- Introduction
- Updating the UEFI
- Updating the Legacy BIOS
- Verifying the BIOS Version
- QNAP NAS Installed with the Legacy BIOS
Introduction
BIOS (Basic Input/Output System) is firmware that initializes the hardware for booting the operating system. Originally referring only to the specific firmware, "BIOS" has also become an umbrella term that includes the newer specification known as UEFI (Unified Extensible Firmware Interface), which has been gradually replacing the legacy BIOS.
While all later QNAP NAS models come preinstalled with UEFI, many earlier models still use the legacy BIOS. To take advantage of certain new features in a QNAP operating system, it is sometimes necessary to update the BIOS (also known as "flash the BIOS").
To update the BIOS on your QNAP NAS, you need the following items:
-
A bootable USB flash drive
Important:
Choose an empty USB flash drive or back up the data on the flash drive. All existing data on the flash drive will be deleted if reformatting is required.
-
A Windows-based computer
-
A USB keyboard
-
An HDMI-compliant monitor
After preparing the required items, follow the steps in Updating the UEFI or Updating the Legacy BIOS, depending on which firmware is on your NAS.
To check whether your NAS uses the legacy BIOS instead of UEFI, see QNAP NAS Installed with the Legacy BIOS.
Updating the UEFI
- Create a bootable USB flash drive.
- Connect the USB flash drive to the Windows-based computer.
- Open File Explorer.
- Locate and right-click the USB flash drive.
- Click Format....
A screen for formatting the flash drive appears.

- Select FAT32 under File system.
Note:
If FAT32 is already displayed, click Close. Skip to the next step and download the latest BIOS file.
- Click Start to initiate drive formatting.
A warning message appears.

- Click OK.
Another message appears when the formatting is complete.
- Click OK.
- Download the latest BIOS file.
Warning:
Only install BIOS updates from QNAP. Installing the BIOS file incorrectly can prevent the NAS from starting or being recovered.
Important:
-
QNAP recommends backing up all your files before initiating the BIOS update.
-
Do not shut down or remove the external power from your device during the process.
-
Ensure power stability during the update process.
- Go to download.qnap.com, and download the compressed NAS BIOS file.
- Extract the compressed file contents.
- Copy the extracted files to the root or a folder on the USB flash drive.
-
- Prepare the NAS for updating the BIOS.
- Power off the NAS.
- Remove all the drives from the NAS.
Important:
Remember the number of each drive. The drive trays will need to be returned to their original bays.
- Connect the HDMI-compliant monitor to the NAS HDMI port.
- Connect the USB keyboard to a USB port on the NAS.
- Connect the USB flash drive to a different USB port on the NAS.
- Update the BIOS from the command-line interface.
- Power on the NAS.
- Repeatedly press F7 in quick succession until the boot options screen appears.

- Select UEFI: Built-in EFI Shell with the up or down arrow key and then press ENTER.
The command-line interface appears.
- Enter fs0: to locate the flash drive.
- Enter dir to verify the contents belong to the flash drive.

- Optional: Repeat the previous two steps by increasing the digit in the command fs0: until you locate the flash drive.
-
That is, fs1:, fs2: (and so on)
-
- Optional: Enter cd BIOS_Folder_Name if the BIOS file is in a folder instead of the root of the flash drive.
-
For example, cd QY47AR14 (if the BIOS folder is named "QY47AR14")
-
- Enter the full name of the .nsh file to start the BIOS update.
-
For example, QY47ar14.nsh

-
- Power off the NAS when the update is complete.
- Remove all the external peripherals, including the monitor, USB flash drive, and USB keyboard, from the NAS.
- Disconnect the power cable.
- Wait 30 seconds.
- Reconnect the power cable to the electrical outlet.
- Insert all the disks back into the NAS in their original disk order.
- Power on the NAS.
Updating the Legacy BIOS
- Create a bootable DOS USB flash drive.
- Prepare a bootable DOS USB flash drive with the free utility Rufus (https://rufus.ie/) on your Windows-based computer.
- Download the executable file.
- Run the file.
The Rufus setup window opens.

- Select your USB flash drive under Device.
- Select FreeDOS under Boot selection.
- Choose the FAT32 file system with the default cluster size.
- Click START to initiate drive formatting.
A warning message appears.

- Click OK.
- Click CLOSE when the Status changes to Ready.
- Download the latest BIOS file.
Warning:
Only install BIOS updates from QNAP. Installing the BIOS file incorrectly can prevent the NAS from starting or being recovered.
Important:
-
QNAP recommends backing up all your files before initiating the BIOS update.
-
Do not shut down or remove the external power from your device during the process.
-
Ensure power stability during the update process.
- Go to download.qnap.com, and download the compressed NAS BIOS file.
- Extract the compressed file contents into a folder.
- Copy or move the folder to the bootable USB flash drive.
-
- Prepare the NAS for updating the BIOS.
- Power off the NAS.
- Remove all the drives from the NAS.
Important:
Remember the number of each drive. The drive trays will need to be returned to their original bays.
- Connect the HDMI-compliant monitor to the NAS HDMI port.
- Connect the USB keyboard to a USB port on the NAS.
- Connect the bootable USB flash drive to a different USB port on the NAS.
- Configure the settings inside the BIOS setup utility.
- Power on the NAS.
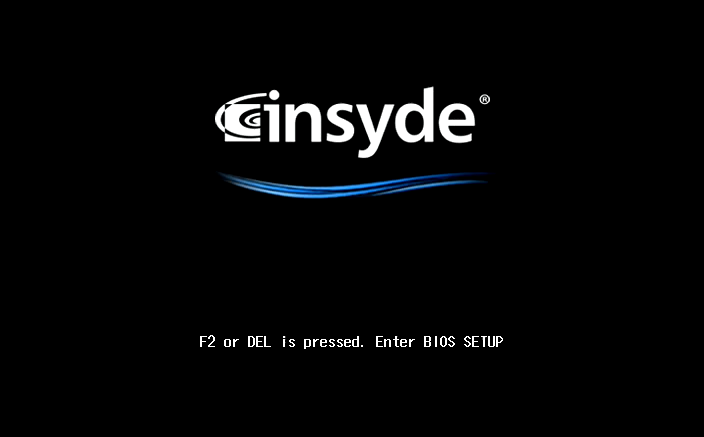
The BIOS setup utitity appears.
- Repeatedly press F2 or DEL until the prompt changes to F2 or DEL is pressed. Enter BIOS SETUP.
Note:
The prompt indicates that the keyboard has been initialized. To prevent the NAS from booting as usual, press F2 or DEL in quick succession when the prompt appears.
Note:
Use the arrow and function keys on the keyboard to navigate the BIOS setup.
- Modify the boot order so the bootable USB flash drive is listed first.
- Go to .
- Press F5 or F6 to move the bootable flash drive to the top of the list.
- Press ESC to return to the main menu.
- Go to .
- Click YES to save the changes and exit the BIOS setup.
- Power on the NAS.
- Update the BIOS from the command-line interface.
- Manually restart the NAS.
- Wait for the command-line interface to appear.
- Enter cd BIOS_Folder_Name.
-
For example, cd QV96IR28 (if the BIOS folder is named "QV96IR28")
-
- Enter the full name of the BIOS file.
-
For example, QV96IR28.bat
The system proceeds to update the BIOS from the bootable USB flash drive.
-
- Power off the NAS when the command-line interface displays the message FPT Operation Passed and the cursor remains in place.
- Modify the boot order.
- Power on the NAS.
- Press F2 or DEL to enter the BIOS setup utility.
- Go to .
- Press F5 or F6 to move USB DISK MODULE to the top of the list.
- Press ESC to return to the main menu.
- Go to .
- Click YES to save the changes and exit the BIOS setup.
- Remove all the external peripherals, including the monitor, USB flash drive, and USB keyboard, from the NAS.
- Ensure the power cable is connected to the electrical outlet.
- Insert all the disks back into the NAS in their original disk order.
- Power on the NAS.
Verifying the BIOS Version
There are two ways to check the BIOS version on a QNAP NAS.
- Check the BIOS version in the BIOS setup utility.
Firmware
Steps
UEFI
Power on the NAS and press F2 or DEL to enter the BIOS setup utility.
The current BIOS version appears on the setup utility screen.
Legacy BIOS
-
Power on the NAS and press F2 or DEL to enter the BIOS setup utility.
-
Go to .
The current BIOS version appears.
-
- Check the BIOS version in QTS 4.4.2 or QuTS hero 4.5.0 (or later versions).
-
Go to .
The current BIOS version appears.
-
QNAP NAS Installed with the Legacy BIOS
The following QNAP NAS models come preinstalled with the legacy BIOS. NAS models not on this list are preinstalled with UEFI.
| ES1640dc | TS-863XU |
| ES1640dc v2 | TS-863XU-RP |
| HS-251+ | TS-873 |
| IS-453S | TS-873U |
| TBS-453A | TS-873U-RP |
| TDS-16489U | TS-877 |
| TDS-16489U R2 | TS-963N |
| TES-1885U | TS-963X |
| TES-3085U | TS-EC1080 Pro |
| TS-1253U | TS-EC1280U |
| TS-1253U-RP | TS-EC1280U R2 |
| TS-1263U | TS-EC1680U |
| TS-1263U-RP | TS-EC1680U R2 |
| TS-1263XU | TS-EC2480U |
| TS-1263XU-RP | TS-EC2480U R2 |
| TS-1273U | TS-EC880 Pro |
| TS-1273U-RP | TS-EC880U |
| TS-1277 | TS-EC880U R2 |
| TS-1673U | TVS-1271U-RP |
| TS-1673U-RP | TVS-1282 |
| TS-1677X | TVS-1282T |
| TS-1685 | TVS-1282T3 |
| TS-251 | TVS-1582TU |
| TS-251+ | TVS-463 |
| TS-251A | TVS-471 |
| TS-253 Pro | TVS-471U |
| TS-253A | TVS-471U-RP |
| TS-351 | TVS-473 |
| TS-451 | TVS-473e |
| TS-451+ | TVS-663 |
| TS-451A | TVS-671 |
| TS-451DeU | TVS-673 |
| TS-451S | TVS-673e |
| TS-451U | TVS-682 |
| TS-453 Pro | TVS-682T |
| TS-453A | TVS-863 |
| TS-453Bmini | TVS-863+ |
| TS-453S Pro (formerly SS-453 Pro) | TVS-871 |
| TS-453U | TVS-871T |
| TS-453U-RP | TVS-871U-RP |
| TS-453mini | TVS-873 |
| TS-463U | TVS-873e |
| TS-463U-RP | TVS-882 |
| TS-463XU | TVS-882BR |
| TS-463XU-RP | TVS-882BRT3 |
| TS-473 | TVS-882ST2 |
| TS-563 | TVS-882ST3 |
| TS-651 | TVS-882T |
| TS-653 Pro | TVS-EC1080 |
| TS-653A | TVS-EC1080+ |
| TS-673 | TVS-EC1280U-SAS-RP |
| TS-677 | TVS-EC1280U-SAS-RP R2 |
| TS-851 | TVS-EC1580MU-SAS-RP |
| TS-853 Pro | TVS-EC1580MU-SAS-RP R2 |
| TS-853A | TVS-EC1680U-SAS-RP |
| TS-853S Pro (formerly SS-853 Pro) | TVS-EC1680U-SAS-RP R2 |
| TS-853U | TVS-EC2480U-SAS-RP |
| TS-853U-RP | TVS-EC2480U-SAS-RP R2 |
| TS-863U | TVS-EC880 |
| TS-863U-RP |
Wie Lange Bekommt Man Bei Qnap Updates
Source: https://www.qnap.com/en/how-to/tutorial/article/updating-the-bios-on-a-qnap-nas
Posted by: bennettyourron1938.blogspot.com
0 Response to "Wie Lange Bekommt Man Bei Qnap Updates"
Post a Comment